Hybrid Modern Public Folders not working for some users
Hey! Ran into a strange issue where certain users were not able to access modern public folders on-premise and some users had no issues at all.
The users that had no issues were users that had a mailbox on-premise and then later migrated to the cloud.
The users that had issues were users that were created via the New-RemoteMailbox PowerShell cmdlet.
I was familiar with this issue on Legacy Public Folders but not on Modern Public Folders.
The fix for Legacy Public Folders is that it’s missing the cloud LegacyExchangeDN as an X500 address on-premise
Solution in a simple 1 liner PowerShell script:
Get-Mailbox user@domain.com | foreach {Set-ADUser -Identity $_.Alias -Add @{Proxyaddresses="X500:"+$_.LegacyExchangeDN}}
So after some digging around and talking to the product engineering team and other peers we came to this conclusion:
The issue for the Modern Public Folders is that it’s missing the ExchangeGUID attribute. And how O365 does a lookup for the modern public folders on-premise.
This seems to have been fixed in Exchange 2013 SP1 CU14 (CU 13 and below are still affected) Additionally there were Free/Busy issues as well due to it looking for a non-existing ExchangeGUID.
So there are two solutions here either upgrade all your Exchange 2013 servers to CU14 or run the following PowerShell cmdlet to add the ExchangeGUID property to the users:
$cred = get-credential

$session = New-PSsession -configurationname microsoft.exchange -connectionuri https://outlook.office365.com/powershell -allowredirection -authentication basic -credential $cred -verbose

Import-PSSession $Session -Prefix EXO

$formatenumerationlimit = -1
Get-RemoteMailbox -ResultSize Unlimited -filter {ExchangeGuid -eq "00000000-0000-0000-0000-000000000000"} | foreach {Get-EXOMailbox -Identity $_.Alias} | foreach {Set-RemoteMailbox -Identity $_.Alias -ExchangeGuid $_.ExchangeGuid}
Or if you don’t like one liners and like an output into CSV:
$cred = get-credential

$session = New-PSsession -configurationname microsoft.exchange -connectionuri https://outlook.office365.com/powershell -allowredirection -authentication basic -credential $cred -verbose

Import-PSSession $Session -Prefix EXO

$formatenumerationlimit = -1
Get-RemoteMailbox -ResultSize Unlimited -filter {ExchangeGuid -eq "00000000-0000-0000-0000-000000000000"} | Export-CSV C:\temp\RemoteMailboxesWithNoGUIDS.csv
$i = Import-CSV C:\temp\RemoteMailboxesWithNoGUIDS.csv
$i | foreach {Get-EXOMailbox -Identity $_.Alias} | foreach {Set-RemoteMailbox -Identity $_.Alias -ExchangeGuid $_.ExchangeGuid}
How to find all the ADFS servers in your environment and run diagnostics against them
Hey everyone!
It has been a hot minute since I’ve posted something here huh?! Life has been busy and that’s a good thing 🙂 Hope you all are well too!
I’ve been real busy here at Microsoft, talking to customers and fixing their issues, most of which I should have blogged about, but hind sight is 20/20 and a bunch of other folks beat me to the punch, so on to the matter at hand.
How to find all the ADFS servers in your environment and run diagnostics against them.
I am by no means a PowerShell pro, but practice makes perfect and this is the first part of a script that I’m really proud of that I made since it fixed a real world issue I and many co-workers in Exchange Online land were dealing with.
In the blurb below it will do the following:
- Ask for your domain administrator credentials
- Grab your logon server from the user that you’re logged on with
- Create a session to that logon server (assuming WinRM is enabled on it, if you see a sea of red after this part, do a “WinRM qc” on that server)
- Set variable for finding all servers in your environment
- Set variable for finding all ADFS servers
- Executing variable $adfsservers to output your ADFS servers (excluding your WAP servers since those should be in your DMZ, right?!)
$cred = Get-Credential

$dc = $env:Logonserver -replace "\\", ""

$s = New-PSSession -ComputerName $dc -Credential $cred

Invoke-Command -Session $s {Import-Module ActiveDirectory}

Import-PSSession -Session $s -Module ActiveDirectory -Prefix dc

$services = "adfssrv","MSSQL$MICROSOFT%"

$servers = Get-dcADComputer -LDAPFilter "(&(objectcategory=computer)(OperatingSystem=*server*))"

$value = 1

if ($servers.count -lt "100") {$adfsservers = ForEach-Object {Get-WmiObject Win32_Service -ComputerName $servers.dnshostname -Filter "Name Like 'adfssrv'" -Credential $cred | select-object PSComputerName -ExpandProperty PSComputerName}}`

else {$adfsservers = @()

do {

$input = (Read-Host "Please enter ADFS server #$value (enter if last one)")

if ($input -ne '') {$adfsservers += $input}

$value++

}

until ($input -eq '')}
$adfsservers
Ok great! Now that we have this information what else can we do with it? Well we can run the ADFS diagnostics script created by the ADFS team against it.
One problem, we would have to login to each ADFS server individually and run the script. How 90’s… So since we’re messing around in PowerShell, let’s leverage it!
Building on the script above we’re going to add the following:
$services = "adfssrv","MSSQL$MICROSOFT%"

$services | ForEach-Object {Get-WmiObject Win32_Service -ComputerName $servers.dnshostname -Filter "Name Like '$_'" -Credential $cred | Format-Table Name, DisplayName, State, StartMode, StartName, SystemName -auto}

$ips = $adfsservers | foreach {Resolve-DNSName $_ | Select-Object IPAddress -ExpandProperty IPAddress}

$adfssrvs = $adfsservers | ForEach {Get-dcADComputer "$_" | Select-Object DnsHostName -ExpandProperty DnsHostName}

$adfssessions = New-PSSession -ComputerName $adfssrvs -Credential $cred

Start-TranScript c:\temp\ADFS-TESTS.TXT -force

Write-host Number of ADFS Servers: ($adfsservers).count

$adfssrvs

$f = "c:\temp\ADFSDiagnostics.psm1"

$c = Get-Content $f

icm -Session $adfssessions -ScriptBlock {mkdir c:\temp -force -erroraction silentlycontinue}

icm -Session $adfssessions -ScriptBlock {param($filename,$contents) `

Set-Content -Path $filename -Value $contents} -ArgumentList $f,$c

icm -Session $adfssessions -ScriptBlock {

C:

cd \temp

Import-Module .\ADFSDiagnostics.psm1

Write-Host -foregroundcolor "Green" Running cmdlet Get-AdfsSystemInformation on $env:computername

Get-AdfsSystemInformation

Write-Host -foregroundcolor "Green" Running cmdlet Get-AdfsServerConfiguration on $env:computername

Get-AdfsServerConfiguration

Write-Host -foregroundcolor "Green" Running cmdlet Test-AdfsServerHealth on $env:computername

Test-AdfsServerHealth | ft Name,Result -AutoSize

Write-Host -foregroundcolor "Green" Running cmdlet Test-AdfsServerHealth showing failures on $env:computername

Test-AdfsServerHealth | where {$_.Result -eq "Fail"} | fl

}
To give a little bit of explanation of what the blurb above does:
- Set variables for the IP addresses of the ADFS servers, variables for the ADFS servers FQDN, variables for creating a PSsession to all ADFS servers at once.
- Set variables for the ADFS service and Windows Internal Database service and check their status on the ADFS servers.
- Copy the ADFSDiagnostics.psm1 from your local c:\temp to the remote session’s c:\temp
- Execute a number of diagnostics on the remote server and output them on the screen.
How to find all the ADFS servers in your environment and run diagnostics against them.
But wait, we have more! There are more tests that we can kick off, we’ll need to run these on the local machine though since it leverages the invoke-webrequest cmdlet which needs Internet Explorer (if IE has never been opened it will error out, just an FYI)
In order to get the next part working I had to make use of Jeremy Jameson awesome hostnames scripts. I crammed all the .ps1 files into a .psm1 and turned them into functions.
Some more explanation on the code below:
- We ask for your ADFS endpoint name
- We import both .psm1 files
- Foreach ADFS server IP address we add it the hosts file one at a time and run code against it and running additional certificate checks.
- We do this because there’s no tool out there yet that checks against internal ADFS servers, only external host names via the SSO test on testconnectivity.microsoft.com
- After the certificate checks, it will check for any services on the ADFS servers marked in an AUTO state that’s currently in a STOPPED state and attempt to start them.
$adfs = Read-Host -Prompt 'Please type in your adfs endpoint hostname (i.e. adfs.contoso.com)'

Import-Module .\ADFSDiagnostics.psm1

Import-Module .\Hostnames.psm1

foreach ($ip in $ips)

{

Add-Hostnames $ip $adfs

Test-AdfsServerToken -federationServer $adfs -appliesTo urn:federation:MicrosoftOnline

Test-AdfsServerToken -federationServer $adfs -appliesTo urn:federation:MicrosoftOnline -credential $cred

$token = [Xml](Test-AdfsServerToken -federationServer $adfs -appliesTo urn:federation:MicrosoftOnline)

$token.Envelope.Body.RequestSecurityTokenResponse.RequestedSecurityToken.Assertion.AttributeStatement.Attribute | ft

Remove-Hostnames $adfs}

Write-Host -foregroundcolor "Green" Starting services marked as AUTO that are now marked as STOPPED

icm -Session $adfssessions -ScriptBlock {get-wmiobject win32_service | where-object {$_.Startmode -eq "auto" -and $_.State -ne "running"}| Start-Service -Verbose}
Stop-TranScript
Get-PSSession | Remove-PSSession
You can download the entire 3 piece script from https://github.com/michaeldeblok/Get-ADFSservers
Once downloaded place them in your c:\temp folder.
Keep in mind that you need to run PowerShell as an Administrator.
Per the ADFSDiagnostics.psm1 script you will need to have PowerShell v4 on all the ADFS servers prior to running the diagnostics script.
The diagnostics script works with ADFS versions 2.0, 2.1 and 3.0
New IOS issue on Exchange Active Sync
iOS device users locked out of Active Directory accounts
When a user changes their Active Directory account password, iOS devices prompt for the new password. The user enters in the new password. However, the device does NOT use the new password and continues to use the OLD password, which causes the account to be locked out.
STATUS
Apple is aware of this issue, and customers should open an Enterprise level support case with Apple to pursue a fix in iOS.
WORKAROUND
On the device, open the Settings panel and edit the profile to force the new password to be used by the iOS device on the next connection.
Microsoft’s main Known ActiveSync Issues KB (http://support.microsoft.com/kb/2563324) has been updated to include this issue as issue 2.10.
Exchange Server high cpu usage
Ever notice that your w3wp.exe is using up all your cpu and pegging at above 90%-99%?
Good chances that iOS devices are hammering it like crazy.
After dealing with this a number of times (thanks Apple) here is a little trick to quarantine device until they are remediated.
in the Exchange Management Shell type the following:
New-ActiveSyncDeviceAccessRule -QueryString “lOS 6.1 10B141” -Characteristic DeviceOS -AccessLevel Quarantine
New-ActiveSyncDeviceAccessRule -QueryString “los 6.1 10142” -Characteristic DeviceOS -AccessLevel Quarantine
New-ActiveSyncDeviceAccessRule -QueryString “lOS 6.1 108143” -Characteristic DeviceOS -AccessLevel Quarantine
New-ActiveSyncDeviceAccessRule -QueryString “los 6.1 10B144” -Characteristic DeviceOS -AccessLevel Quarantine
New-ActiveSyncDeviceAccessRule -QueryString “lOS 6.1.1 108145” -Characteristic DeviceOS -AccessLevel Quarantine
This will effectively put those versions into Quarantine and take them out automatically once they upgrade to a newer firmware version.
Also setting up a recycling schedule or certain limits in IIS before it recycles would also be a good thing to do after this.
Another cause could be the following:
W3wp.exe process consumes excessive CPU and memory resources on an Exchange Client Access server after you apply Update Rollup 5 version 2 for Exchange Server 2010 SP2 which is re-mediated with Exchange SP3
Hide federated user from GAL on Office 365 with no Exchange server On-premises
While working on a clients environment a RFC came in to hide certain users from the Global Address List as they were no longer working for the company.
Which brings us to a minor set back within full cloud environments; since there was no local exchange server how do I change the attribute for hiding a user?
First thing I tried off the bat was since I do have an Exchange environment running, is add their Exchange Online environment into my management console.
Which works perfectly and if they weren’t federated users (dirsync running locally for SSO) I would not have had this error:
So this brings me to a challenge on how to solve this, which is actually quite simple, I’ll break it down into 8 simple steps for you:
1. Logon to a local DC and make sure you are an Enterprise & Schema Admin.
2. On the same server insert the Exchange 2010 CD (or download Exchange 2010 SP2 and unpack it).
3. Open up a CMD prompt and browse to the CD/SP2 directory.
4. Extend the schema by executing the following command: setup.exe /ps (if this is not sufficient you can also do “setup.exe /PrepareAD” and “setup.exe /pl“)
5. After this is done open up adsiedit.msc and connect to the “Default Nameing Context”
6. Drill down to the user that needs to be hidden and select properties.
7. Find the Attribute called “MsExchHideFromAddressLists” and set it to “TRUE” (if the Attribute is not there yet, wait a few minutes as it may still be being populated/synced over other DC’s)
8. After the setting is made, connect to your dirsync server and start the DirSyncConfigShell.psc1 to force a manual sync by executing the command “Start-OnlineCoexistenceSync”
After this you will find that the user is not longer visible in the GAL.
Good luck!
Getting Lync mobile to work on your cell phone with Office 365
Microsoft has released the new Lync Mobile Client for IPhone, iPad and Windows Phone!
Here’s how to make it work with Office 365:
You need to add two CNAME entries:
sip.YOURDOMAIN points to sipdir.online.lync.com and
lyncdiscover.YOURDOMAIN points to webdir.online.lync.com
replace YOURDOMAIN with your own domain and it will work.
Good luck!
Migrating from Google Apps to Office 365 in 6 steps
Hi everybody!
I would like to start off with saying that I will keep this as straightforward as I can, I do not want to get into all the details of pro’s and con’s of Google Apps or Office 365, there are many other sites that can help you out with this.
These are my 6 steps for migrating from Google Apps to Office 365:
Step 1 – Sign up for the trial
Step 2 – Add a domain
Step 3 – Add users
Step 4 – Email Migration
Step 5 – User setup
Step 6 – Finalizing the migration process
There will be a followup on how transfer your Google Docs to SharePoint Online in the near future as well.

Migrating from Google Apps to Office 365 – Step 6
INDEX / Step 6 – Finalizing the migration process
We’re almost done! The last few things that you have to do is remove all reference to Google Mail in your DNS Manager.
Items that need to be removed are:
MX Record
TXT Verification Record
And all other reference to you may find to Google Mail.
Please do the following step after 72 hours of removing all reference to Google Mail.
Now log back in to the Portal and clik on Manage under Exchange Online.
Select E-Mail Migration and click on Complete migration.

Click Finish to complete the process.

This concludes my migration from Google Apps to Office 365, I must say typing this manual took WAY longer than the actual migration, just to show how fast it can go!
I hope all this information was useful to you, if you have any questions please drop a comment in the main thread and I will answer.
Everyone goodluck with your migration!
P.S. Don’t forget to cancel your subscription with Google Mail 😉
Migrating from Google Apps to Office 365 – Step 5
INDEX / Step 5 – User Setup
Exporting Items from Google Mail
Great all the back-end details are done! Time for the front-end
First things first, assuming the users want their contacts and calendar items (and they usually do 🙂 they have to do the following:
Let the user login to their Google Mail account and click on Contacts and select Export.
Let the user choose between “My Contacts” or “All Contacts” then select Outlook CSV format for Export.

Save the file on the users desktop.

Here you can see I populated the calendar with some items so that we may later verify them in Outlook.

Then let the user type in this url: www.google.com/calendar/exporticalzip so that you may download their calendar in an ICAL format
Save the file to the desktop and extract it.

Now let the user login to the Office 365 Portalwith their temporary password.

The user will be prompted to change their password immediately. It must at least be 8-characters, have a capital and/or a number/special character.
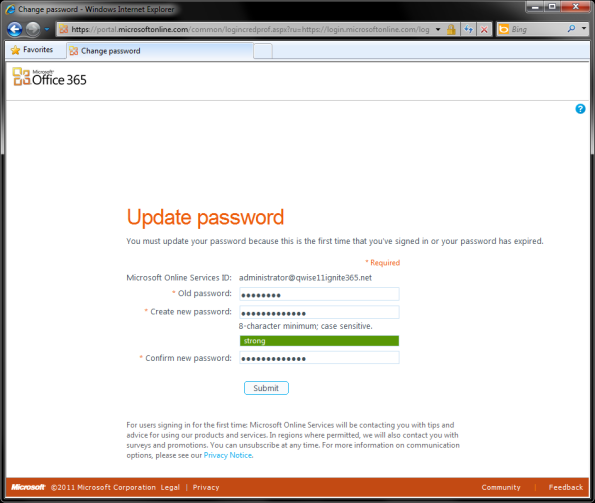
Once the password is changed the user most login with the newly created password.

Once logged in the user will arrive on the Portal Home page where they can start Outlook Web, share files via the Team Site (SharePoint Online) and Download software.
Let us start with Outlook Web by either clicking on Outlook at the top of the page or on Inboxunder Outlook.

When Outlook Web is started for the first time the user must choose the Display Language and the Time Zone click OK to continue.

For comparison I made a screenshot of my Google mail and my Outlook Web Mail side by side; they look identical to me so that means the migration went well (of course if it didn’t you would have seen that already)


Click on Contacts and then select Import.

Select the Contacts.CSV file you saved earlier on the users desktop. And click Next to continue
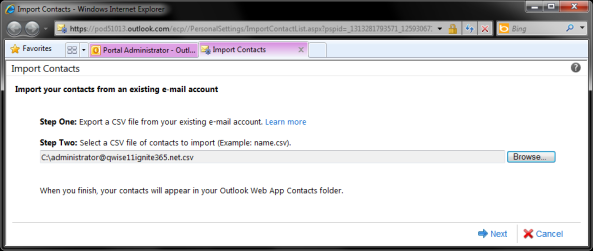
Select Finish to close the import screen.

Installing Office Professional Plus
Exit Outlook Web by clicking back on Home. On the right hand side of the screen you will see Downloads under Resources, click on it.
Select the apropriate Language and Bit Version for your user and click install. 
If you are a System Administrator overseeing this migration then Save the file to a USB disk so that you don’t have to download the software over again and congest the network.
If your company has System Center Configuration Manager you can also deploy this as a package
Do keep in mind that this software cannot be installed on a Terminal Server since it is user bound.
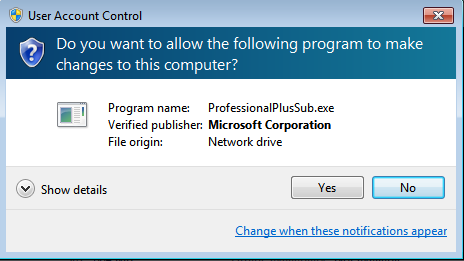
Once downloaded execute the program

Select Yes to allow this installation to continue.
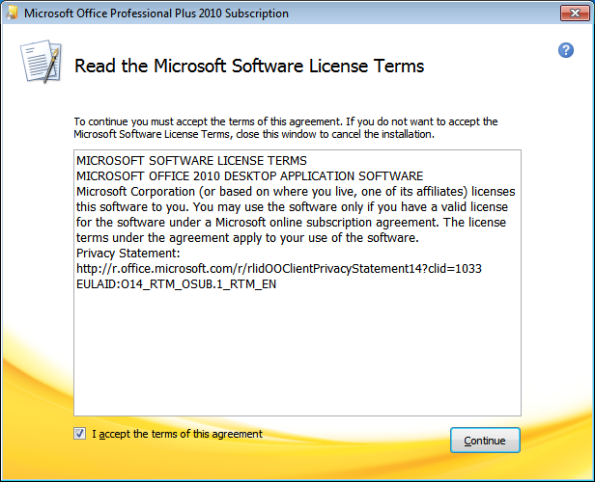
Accept the agreement and Continue.
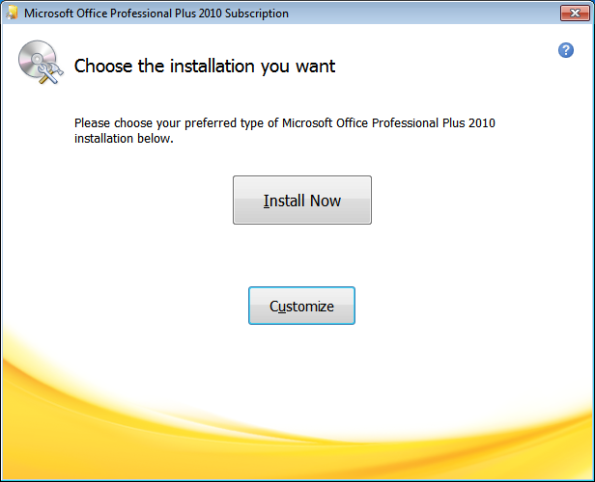
Click customize.
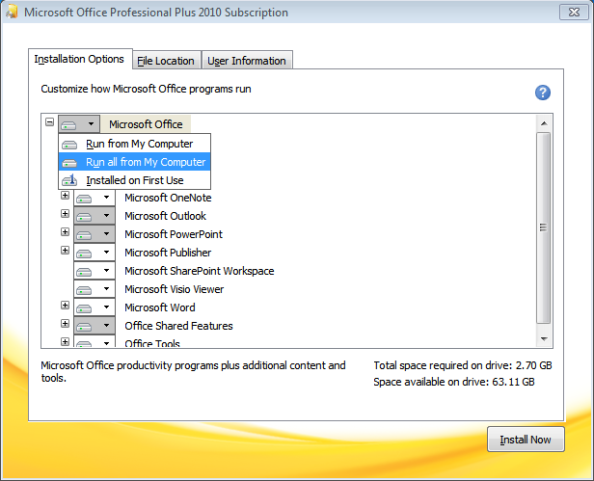
Select Run All from My Computer and click User Information.
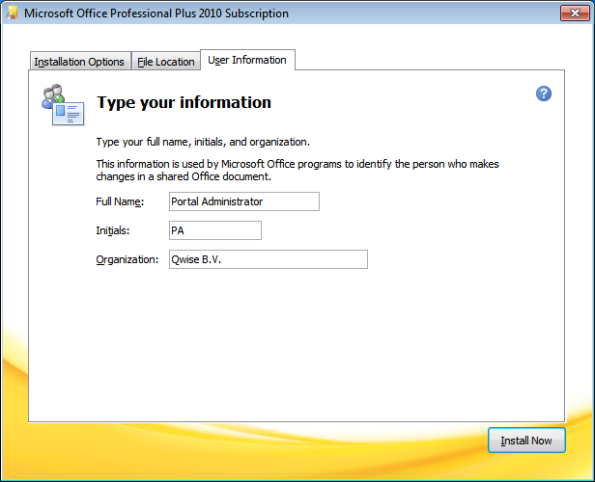
Fill in the user details and click Install Now.
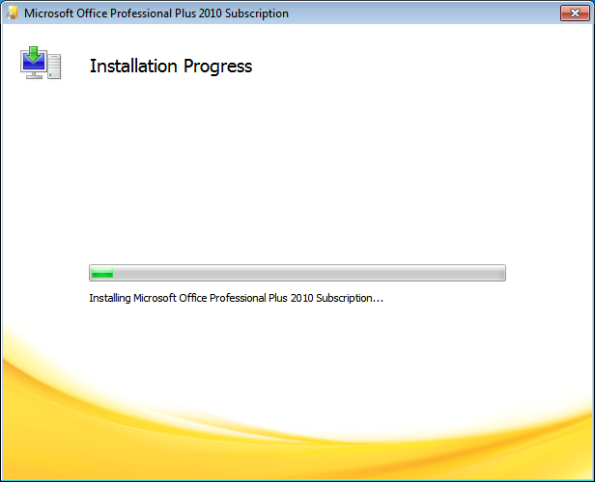
The installation is now in process, click closeonce finished.
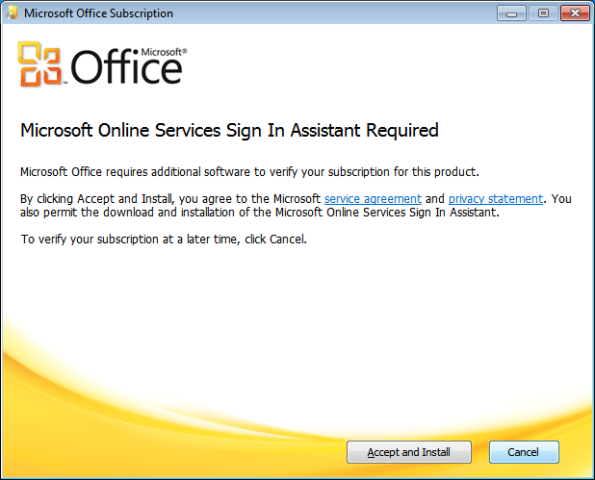
Click Cancel on this screen to stop this installation.
(you will restart it after you have installed Lync)
Confirm by clicking Yes.

Now go back to the Download screen under Resources and scroll down to Lync.
Select the apropriate Language and Bit Version for your user and click install.

If you are a System Administrator overseeing this migration then Save the file to a USB disk so that you don’t have to download the software over again and congest the network.
Once downloaded execute the program

Select Yes to allow this installation to continue.

Click Install to continue.

AllowMicrosoft updates for this program.

Untick the checkmark to start Lync and click Close.
If Lync starts up then close it by rightclicking the icon in the taskbar and select Exit.

Once again go back to the Download screen under Resources and scroll down to Set up and configure your Office desktop apps.
Click on Set Upto continue

Select Runto install the program.

Let the user sign into start the configuration process.

Click continue to Configure desktop applications and install updatesselect yes when prompted by User Account Control.

Accept the agreement.

Click Finish to start configuring Outlook to connect to Office 365.

Office Professional Plus has been installed; select Microsoft Outlook to continue.

Click Next.

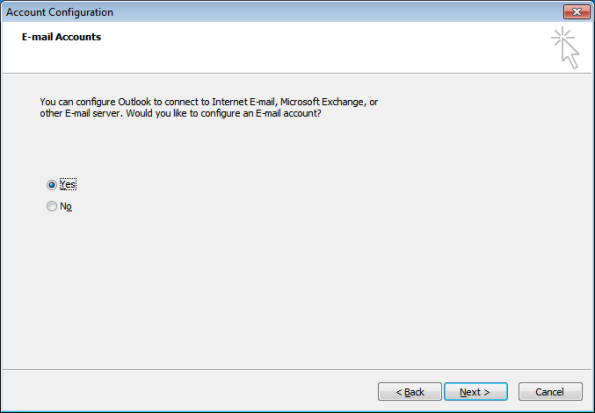
Select Yes and click Next.
Type in the users first and last name followed by the email address and password and click Next.
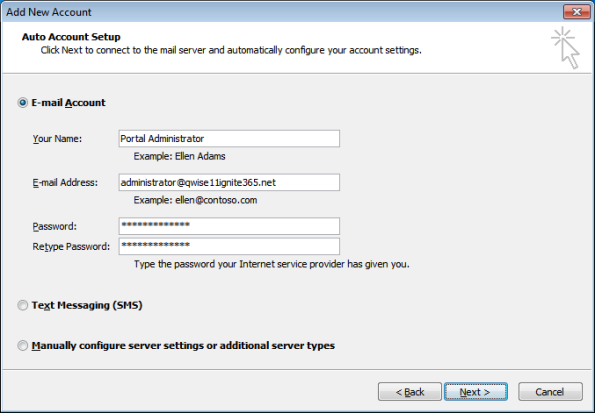
Since we created a CNAME record for autodiscover, outlook is now able to resolve where your mailbox is. Click Finishto open Outlook.
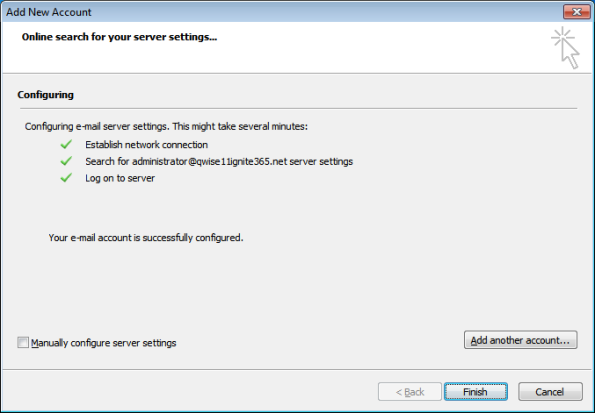
Select Use Recommended Settings and click OK, select Yeswhen the User Account Control screen comes up.

Select the Calendar.

Select File => Open => Import.

Select Import an iCalendar (.ics) and click Next.

Click on Import.

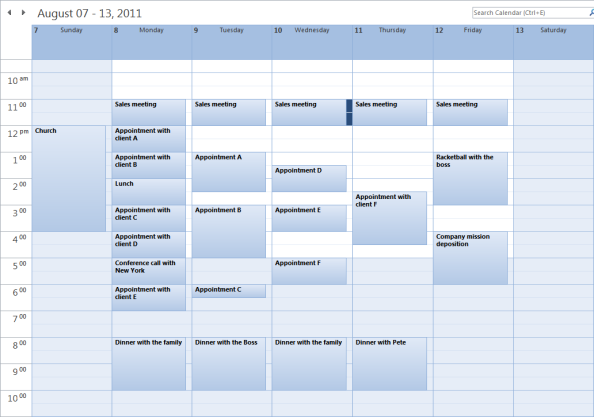
The calendar is now populated again with all the appointments as seen in the screen below.
Eventually the screen below will come after everything is set up, let the user Sign in to active their subscription. Once finished click Close.

Now would be a great time to start Lync. Let the user sign in with their e-mail address.
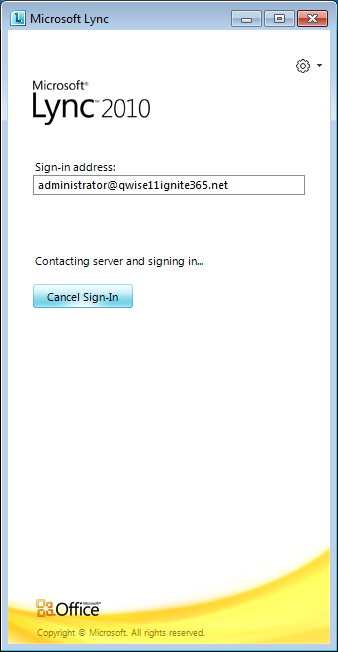
They will be prompted to type in their user name again (which is their e-mail address) and password, click Sign Into continue
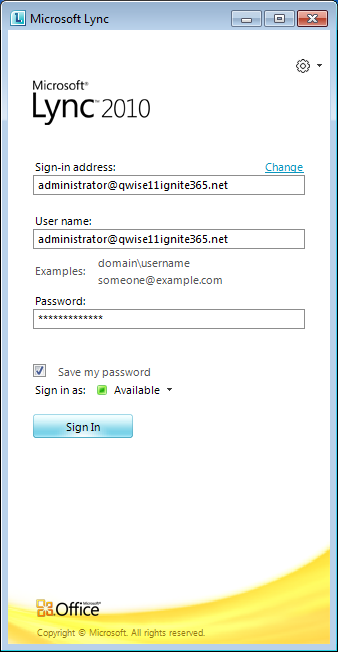
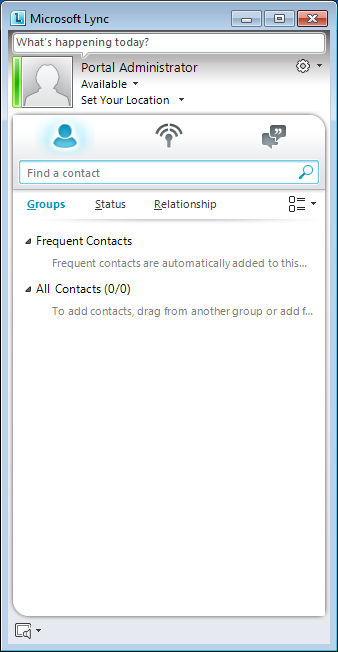
Succes! If everything has been set up correctly you should be able to log in.
If another user would logon on the same computer, they might get the following whilst trying to connect to Lync. Tick the checkbox and click Connect.

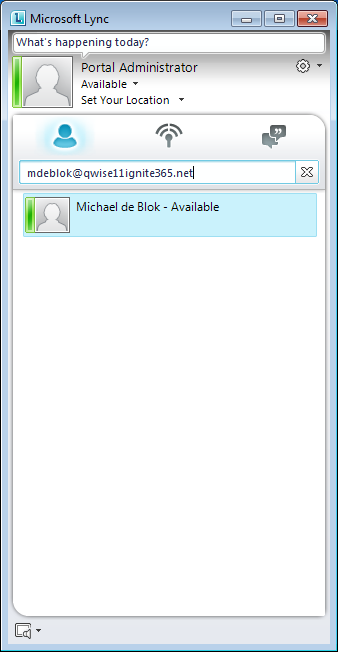
How to add a co-worker on Lync? Type their entire email address in the white field where it says Find a contact.
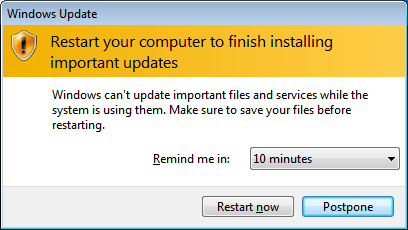
So now that everything is installed it’s time to run Windows Update on the client computer, Install all updates.

Restart the computer.
Run Windows Update once more to install Service Pack 1 for Microsoft Office 2010.

Migrating from Google Apps to Office 365 – Step 4
INDEX / Step 4 – Email Migration
On the Admin page in the Portal, click on Manage under Exchange Online to start configuring the migration process.
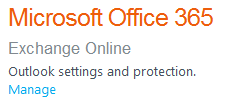
Select E-Mail Migration and click on New

Select IMAP and click on Next.

Now it’s time to fill in the required fields:
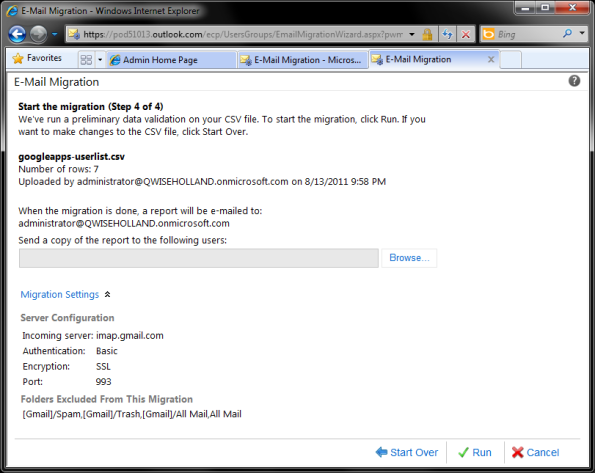
IMAP Server: imap.gmail.com
Authentication: Basic
Encryption: SSL
Port: 993
Number of mailboxes to migrate simultaneously: 10
(I would assume that Google has a good enough connection to handle 10 connections for migration)
Click Next to continue

Add the following folders into the exclusions:
All Mail
[Gmail]/All Mail
[Gmail]/Trash
[Gmail]/Spam
You may also add [Gmail]/Starred, [Gmail]/Important if you like.
This is all done to remove duplicate emails
Click OK to continue

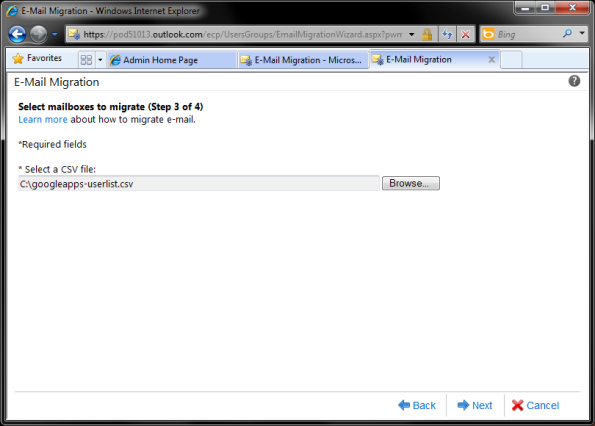
OK so next up is importing all the Google mail accounts through a simple CSV file that should look like this:
EmailAddress,Username,Password
test.user.01@QWISEIGNITE365.NET,test.user.01@QWISE11IGNITE365.NET,pass@word1
Once again if editing through Excel make sure that they are komma seperated in stead of through tabs.

Select the CSV file and click Next.
Click on Run to start the process.
After Run is clicked you will be brought back to the E-Mail migration page to see the progress of the migration.

Once the migration is finished then will be a great time to change the MX records to point to Exchange servers online.
Go back to Domains under Management on the Admin page in the Portal, view the properties of your domains and select DNS Settings to see where your MX record should be pointing to.
Then go to your DNS Manager and add the MX record. Mine looked like the following:


